Sketching is a crucial stage before lip permanent makeup. In this blog, we will explain how to correctly map the lips for permanent makeup, which products are suitable for mapping, and what tools you will need.
Hello Mi Amore!
Permanent makeup is currently at the peak of popularity among both artists and clients. One of the most important stages in PMU is drawing the future shape—the sketch—before starting the procedure. It allows you to coordinate with the client's wishes and visualize the result. Today, we will talk about how to correctly perform lip mapping, which products are suitable for sketching, and what tools you will need.
Methods for Lip Mapping in Permanent Makeup
When choosing a suitable mapping method, you should consider several criteria:
- Convenience. You should be comfortable working with your chosen method;
- Sketch Contrast. The outline of the future permanent makeup should have high contrast. This allows you to evaluate the architecture of the sketch correctly and helps the client visualize the final result;
- Sketch Durability. To avoid wiping away the outline with your fingers during the process, the sketch must be smudge-proof.
Products for Lip Mapping in Permanent Makeup
There are several main mapping methods used by PMU artists:
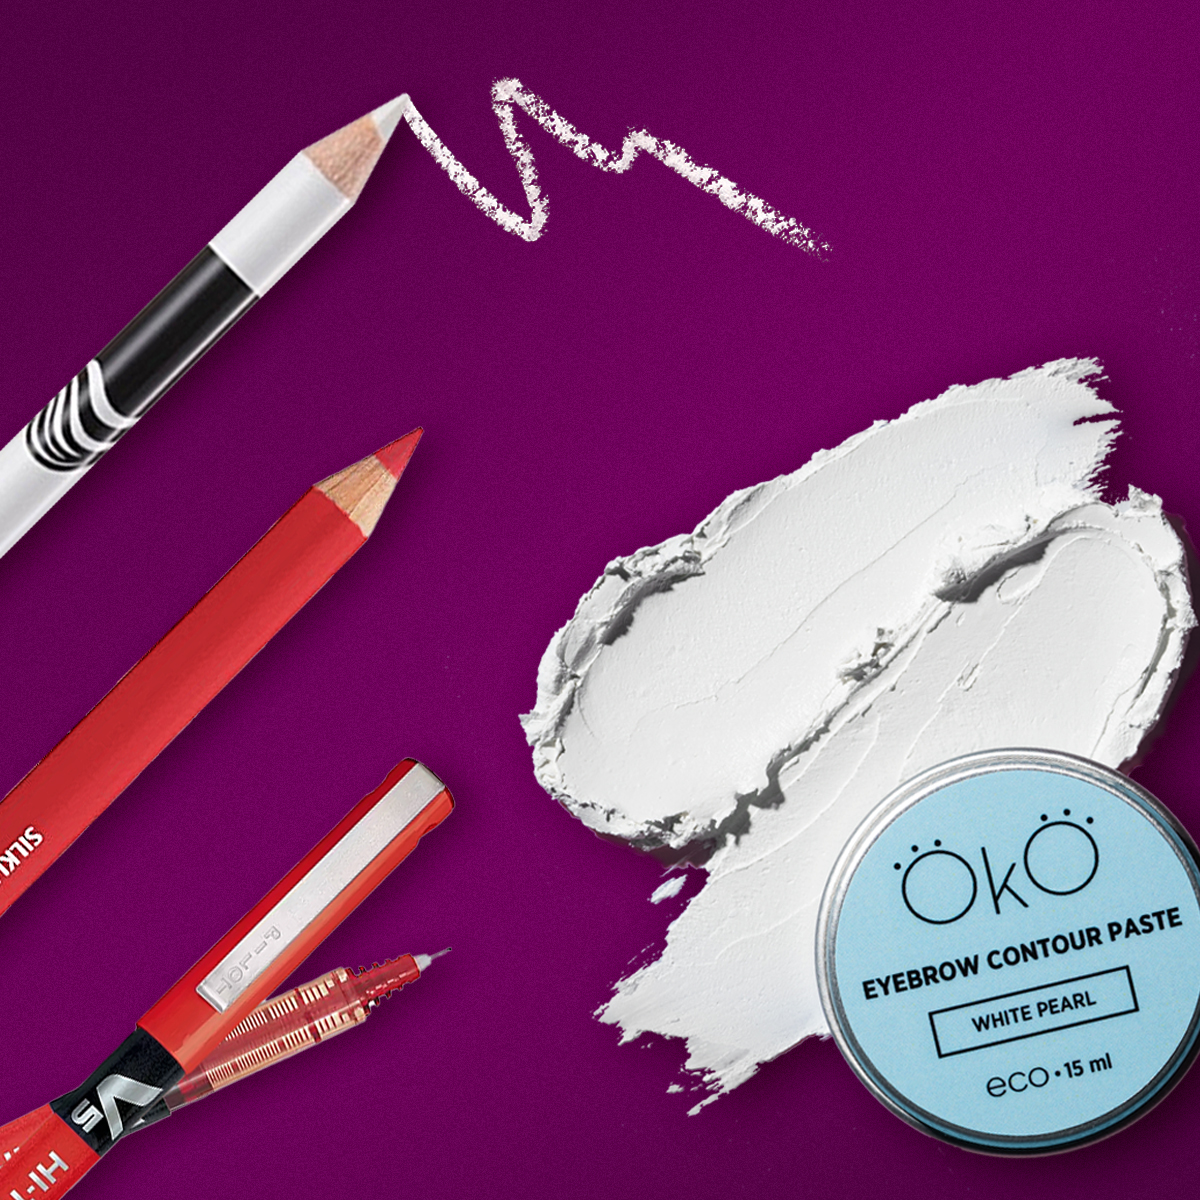
Mapping with a cosmetic lip pencil. The pencil should be well-sharpened and have a soft texture to draw the lip architecture neatly and clearly.
Tip #1. Choose pencils in a contrasting color so the sketch is prominent and the client can evaluate the shape.
Tip #2. Fill in the lips completely with the pencil. This looks more aesthetic and provides the best visualization of the final permanent result.
Surgical marker or red gel pen. This method is more durable during work but has its drawbacks. For example, when using a red gel pen, you get a saturated red glossy sketch, which can distort the client's perception and focus their attention on the color rather than the contour itself.
Mapping Paste. The most convenient and aesthetic way to map lips before permanent makeup. Using paste allows for a high-contrast outline that is well-received by clients. Another advantage of using mapping paste is that it keeps the mucosa clean, allowing you to better control the process of tattooing the pigment.
Tip #3. Use OKO mapping paste; it has a thick consistency, doesn't clump or smudge, and won't melt from body temperature.
Tip #4. Be sure to set the sketch with powder to lock the mapping in place. This makes it resistant to accidental touches and preserves the mapping longer during the procedure. Any transparent HD powder with a long-lasting effect is suitable for this.
Mapping with a white pencil. A method similar to mapping paste, preferred by those who find it easier to work with pencils and want to delineate the outer lip contour.
Tip #5. You can combine mapping methods. For example, create the sketch with a pencil or gel pen and then fix the outer contour with paste or a white pencil. Always prioritize your own comfort during the process.
Brushes for Lip Sketching Before Permanent Makeup
Choosing the right mapping brush significantly impacts work speed and convenience. When selecting brushes for lip mapping, focus on the brush cut and how thin the bristles are.
For comfortable work, you will need the following brushes:
- Flat, straight mapping brush. Thin, flat brushes like Creator #25 or Wobs W5257 are used to draw the lip contour. Their straight cut makes it easy to create a high-quality outline and blend the paste;
- Rounded cleanup brush. Rounded brushes, such as Creator #20, are convenient for cleaning up the lip contour. They are perfect for drawing a beautiful and natural Cupid's bow.
- Fluffy brush for setting the sketch. Any natural or synthetic fluffy brush can be used to apply powder.
How to Create a Lip Sketch for Permanent Makeup?
Before starting the procedure, prepare all necessary materials (pencil/pen/paste, mapping brushes, powder), discuss the client's wishes, and evaluate the initial anatomy.
Important! You cannot significantly enlarge lips by going far beyond the natural border with permanent makeup. Pigment sits differently on the mucosa compared to the skin; once healed, the results will differ and look unappealing.
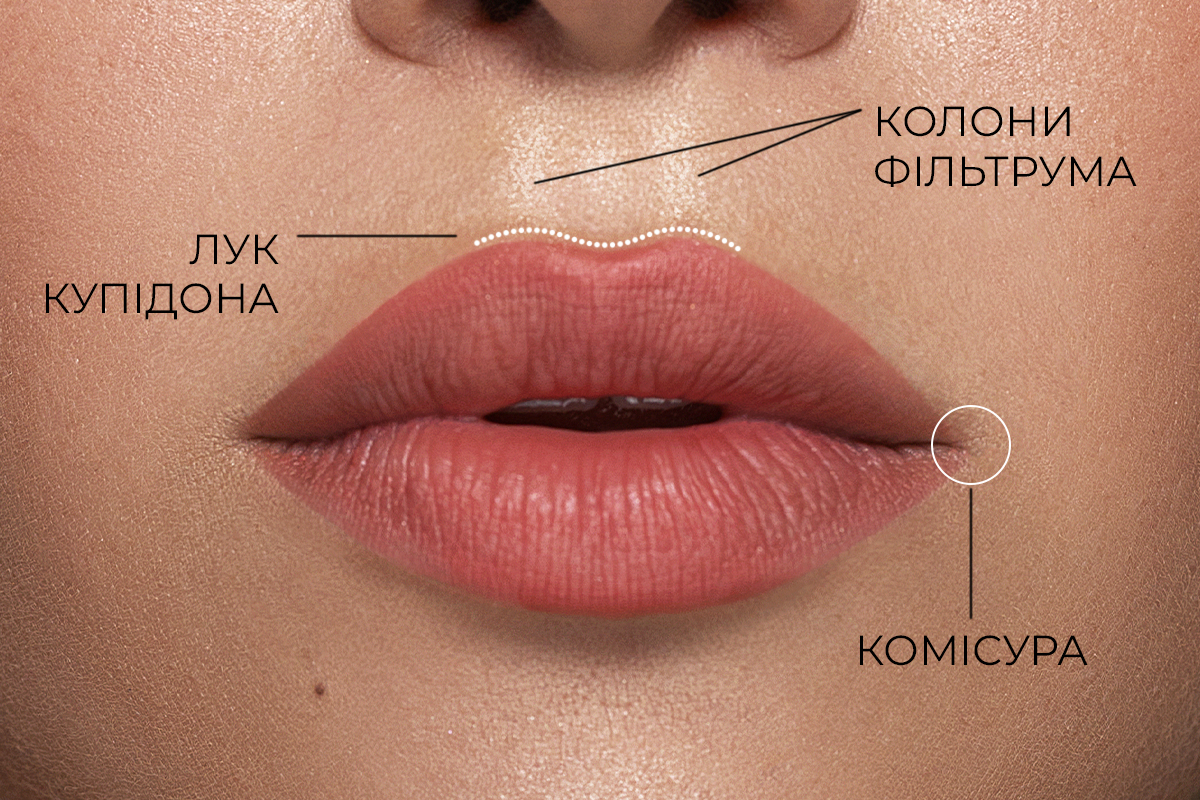
Proper sketch architecture always relies on the main points of the lip structure:
- Philtrum columns;
- Cupid's bow;
- Commissures (corners of the mouth).
Correct Lip Mapping with Paste:
- Use a flat, straight-cut brush to make marks at the points of the philtrum columns and mark the midpoint between them;
- Visually draw parallels down from the philtrum column points and mark parallel points on the lower lip;
- Mark the corners of the mouth (commissures);
- Connect the Cupid's bow points. Draw the line while blending the paste upwards. Do not try to make the lines perfectly smooth immediately; you can adjust them later with a round brush;
- Connect the commissures to the bow using short, dabbing strokes and blend the paste upwards;
- Clean up the inner part of the contour along the mucosa using a round flat brush and micellar water. The round brush shape is very convenient for softening the Cupid's bow;
- Connect the points on the lower lip;
- Connect the corners of the commissures to the sketch on the lower lip;
- If necessary, clean up the contour with a round brush and blend the paste downwards;
- Be sure to set the finished sketch with transparent HD powder to fix it.
Tip #6. To make it easier to work on the lower lip, especially if the client has lip fillers, ask them to gently bite their lower lip. This provides better access to the surface.
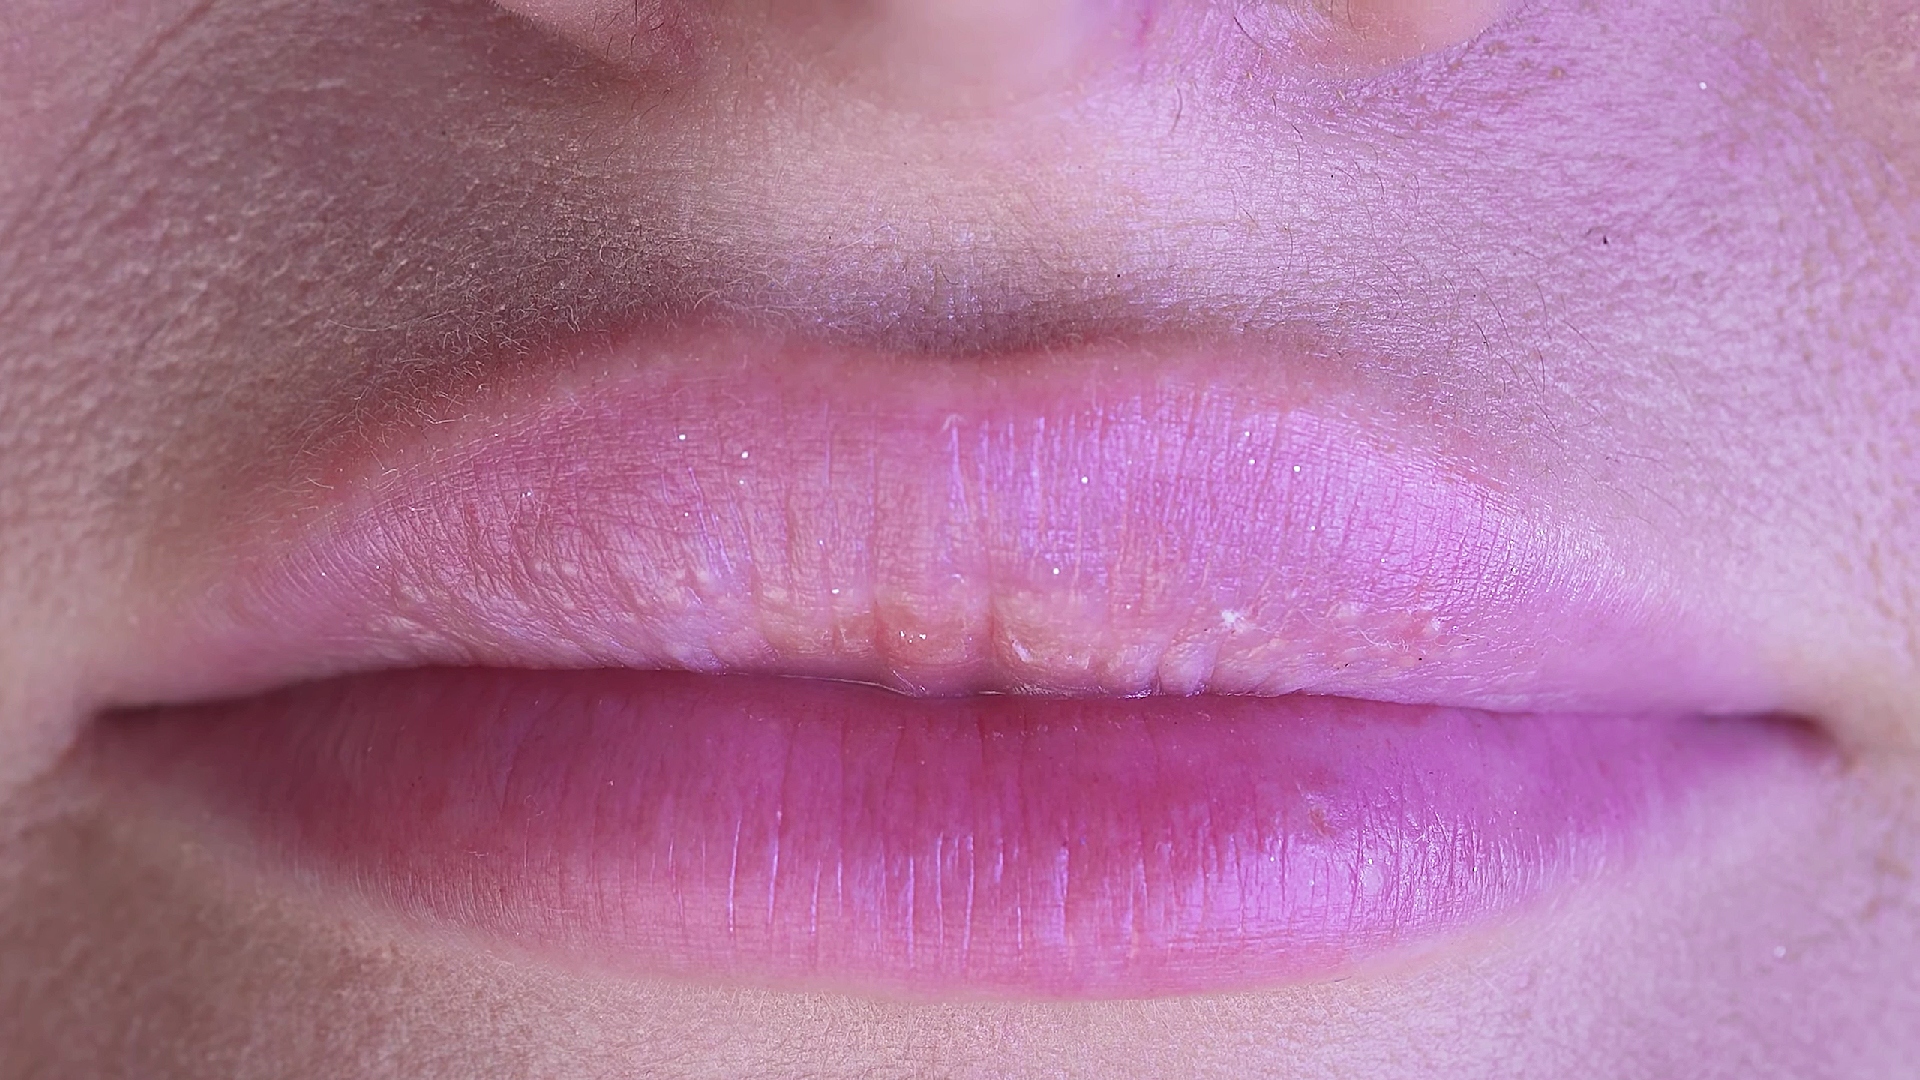
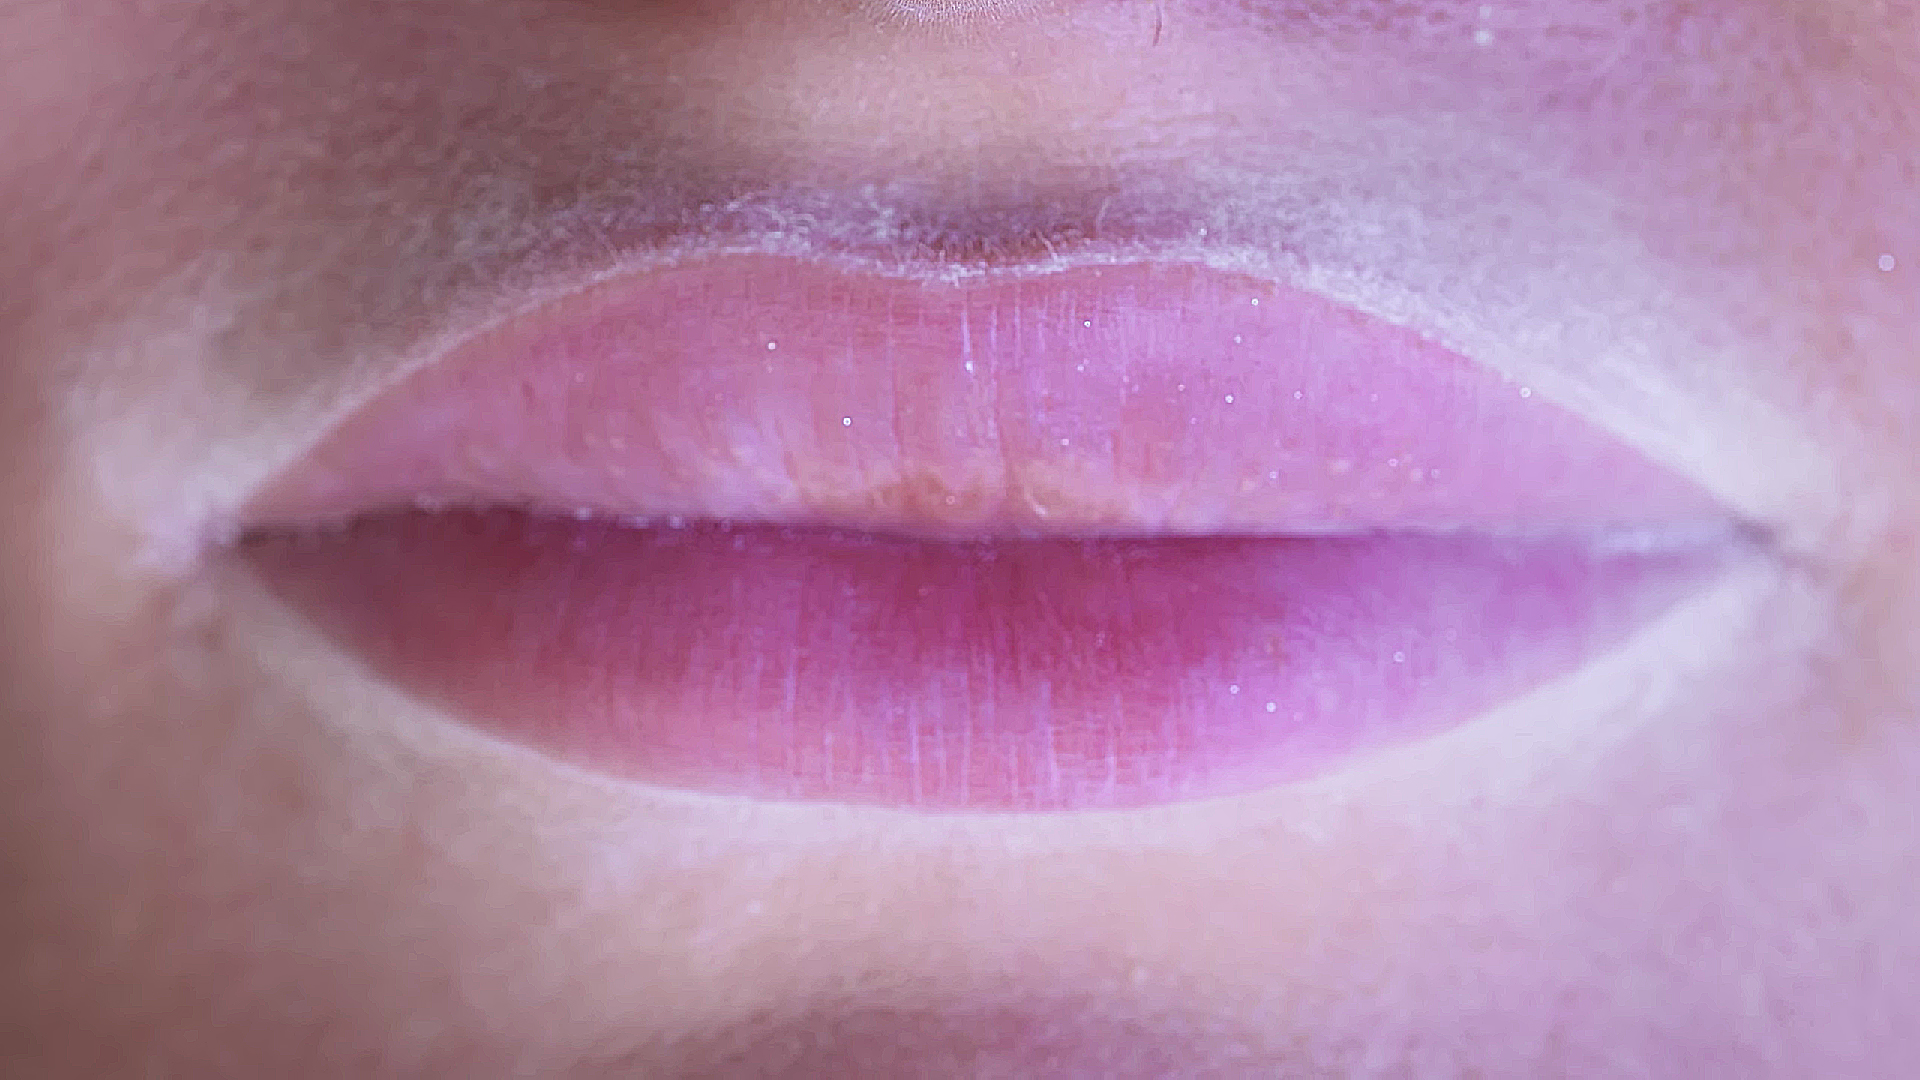
That's it—your sketch is ready, and you can proceed to the next stages of the procedure.
If you want to watch a video tutorial on lip mapping, visit our YouTube channel and check out the tutorial by Anna Sobakina.