In this article, our most dedicated beauty hunter Anna Sobakina will explain how to choose cartridges for permanent makeup. We will cover the different configurations, how they differ, and which cartridges are suitable for eyebrows, lips, and eyelids.
Hello, dear beauty hunter!
Anya Sobakina here today. I hope you've already noticed that we have a new section on our website with permanent makeup products? Oh, yessss, I’ve been waiting for this for so long!
Therefore, our new topic for discussion today is permanent makeup—specifically, permanent makeup cartridges: how they differ and which ones to choose.
What types of permanent makeup cartridges are there?
To evaluate the characteristics of a cartridge and understand what it is suitable for, we first need to learn how to decode the values on the packaging.
Cartridges differ by:
- thickness;
- configuration;
- number of needles in the module grouping;
- taper (sharpening).
It sounds very complicated and intimidating, but it's not. With a little practice, you'll be able to distinguish cartridges in an instant.
I will help you understand the different types of modules for permanent makeup and decode all the markings using examples.
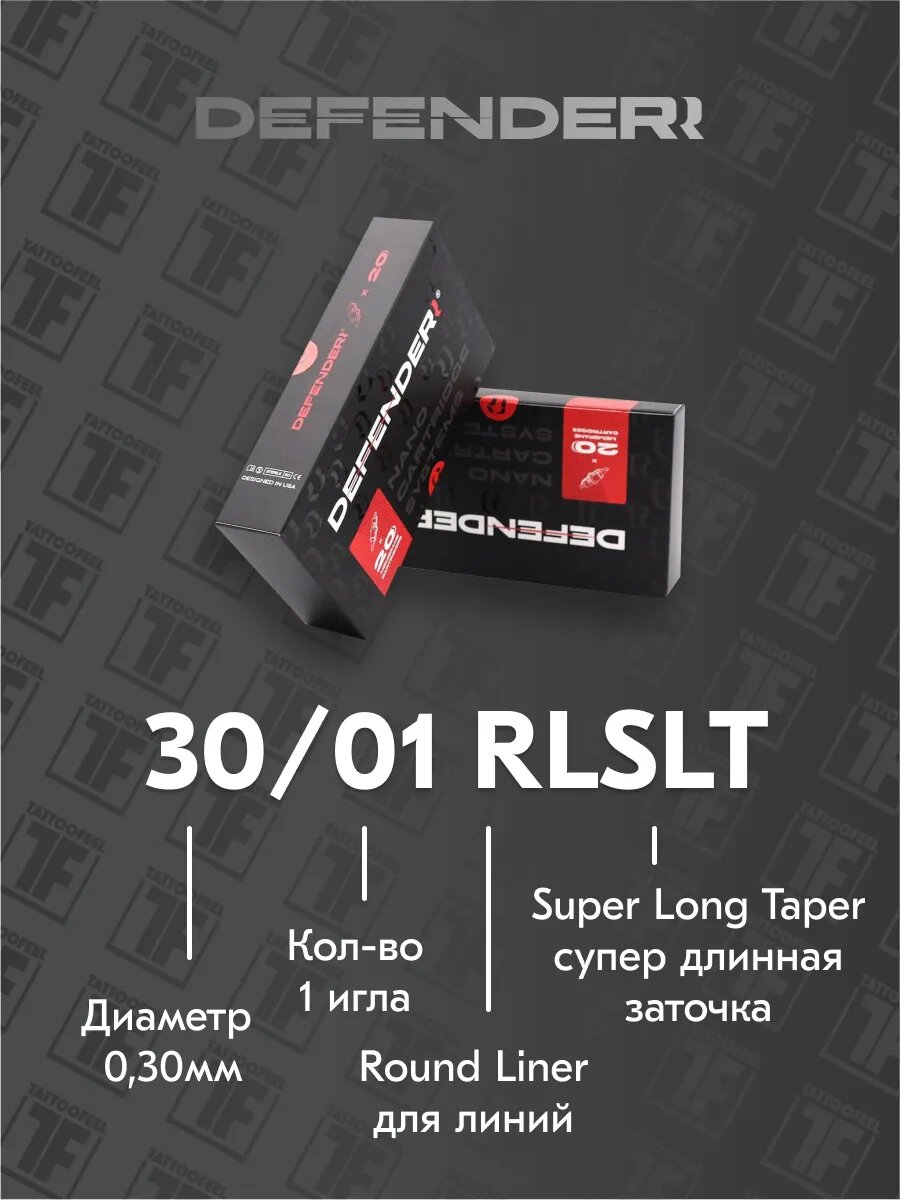
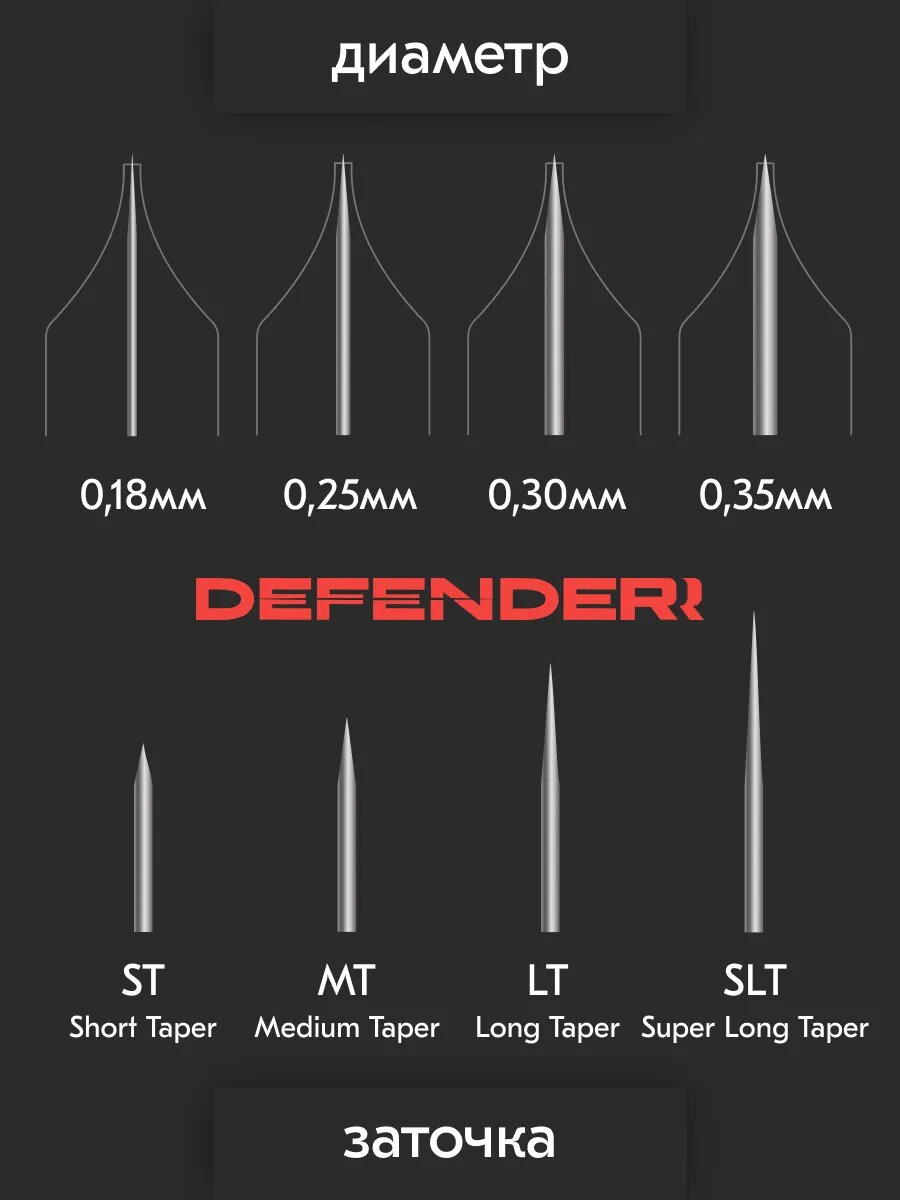
Let's break down the module modifications using Defenderr cartridges as an example, and then we'll study each marking in more detail.
Needle thickness for permanent makeup
The diameter of the needle determines the size of the pixel at the output and how "airy" the coloring will be. The thicker the needle, the larger the pixel.
On packaging, you will most often see values like 0.25, 0.30, 0.35;
however, some brands (e.g., MAST) have changed the marking to 8, 10, 12.
Accordingly: 0.25 = 8, 0.30 = 10, 0.35 = 12.
Let's look at the main diameters and what they are recommended for:
- 0.25 — ideal for dry or mature skin. Creates very soft shading and is also suitable for eyelid work. I mostly use these for organic pigments, such as the Organic Love series by Face.
- 0.30 — a universal option. This thickness is suitable for both eyebrows and lips. Ideal for mineral pigment application. This is my choice.
- 0.35 — leaves the largest pixel, excellent for oily and porous skin. However, this diameter is not recommended for eyelids.
Next, we see numbers. These indicate the number of needles in the grouping. In permanent makeup, /01 (one needle) or /03 (three needles in a grouping) are most commonly used. Accordingly, a single-needle grouping places one dot at a time, a three-needle grouping places three at a time, and so on.
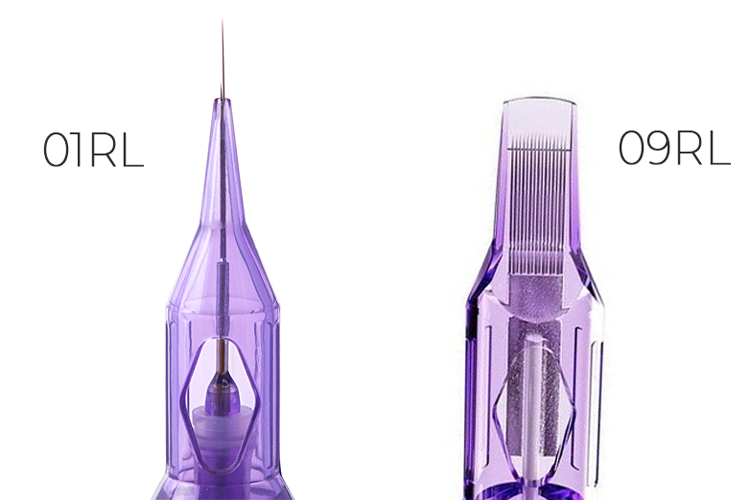
Important: the more needles in the grouping, the faster and denser the coloring. However, in this case, the skin provides more resistance, which requires more pressure and higher machine power.
Still processing the info? Let’s keep going, we’re almost there.
Main types of needle groupings in tattoo modules
Next on the package, we see the configuration of the grouping. The type of grouping tells us how the needles are positioned relative to each other.
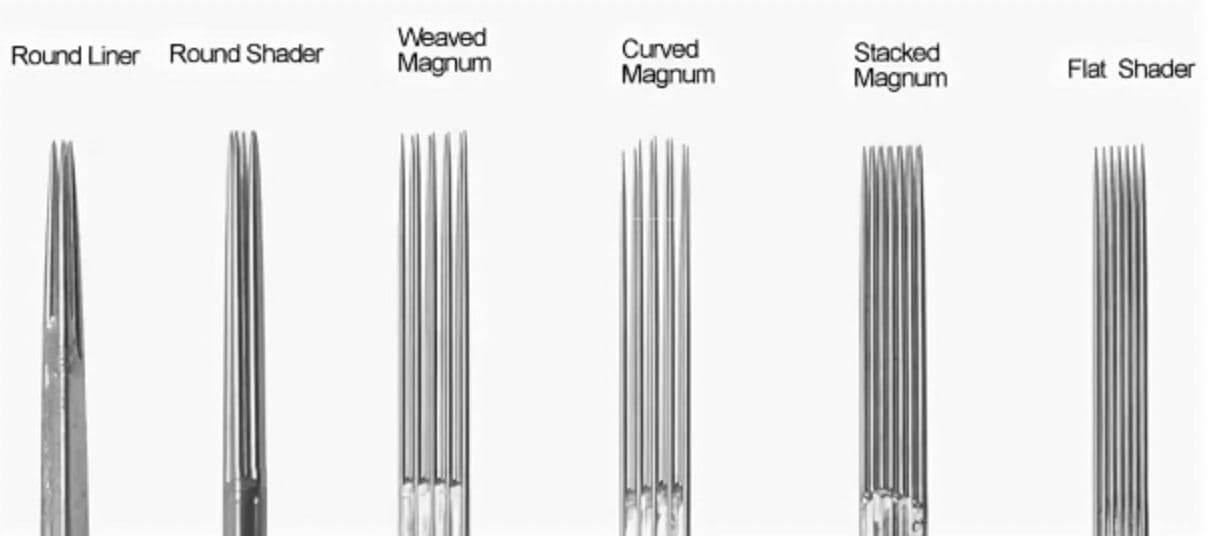
- RL (Round Liner) — needles brought together into an oval grouping. In most cases, these cartridges are used for permanent makeup. All subsequent types are listed more for general knowledge.
- RS (Round Shader) — needles positioned parallel to each other in the grouping, ideal for shading.
- M (Magnum) — coloring needles. Divided into M1 (a single row at the ends diverging in a checkerboard pattern) — used for light shading. M2 (dense grouping in two rows) — suitable for deep coloring.
- RM (Round Magnum) — crescent-shaped grouping, used for light shading.
Which needle taper should you choose for permanent makeup?
The taper type is the length of the sharp part of the needle. There are three types of tapers: long, medium, and short.
- LT (Long Taper) — a long sharp taper of about 7.5 mm. Such a needle makes a small diameter puncture, ideal for fine lines.
- MT (Medium Taper) — a medium universal taper, about 3.5 mm long. Suitable for virtually any permanent makeup work.
- ST (Short Taper) — the "bluntest" tool, makes a large diameter puncture, ideal for dense coloring.
A special configuration is textured needles. Such a needle has a kind of ribbed, textured coating. Due to the texture, it picks up more pigment and leaves it in the skin. These needles are marked with an additional T or Texture prefix (e.g., Kwadron 35/1 RLLT-T cartridges).
In permanent makeup, the taper is selected depending on the pigment application technique, skin type, and the artist's individual preferences.
Which cartridges should a beginner permanent makeup artist choose?
So what should you ultimately choose, you ask? Well, darling, there's only one answer—you have to try them out. It's like choosing tweezers for a brow artist—everyone has a different hand, different pressure, and their own preferences for comfortable work. Luckily, at Beauty Hunter, you can buy various cartridges in packs of 5 to determine what’s perfect for you.
I try new ones every time. Here are a few that I liked:
- Bulldog 30/01 RLLT-T cartridges;
- Mast Pro 1001RL cartridges;
- Kwadron PMU Optima cartridge series.
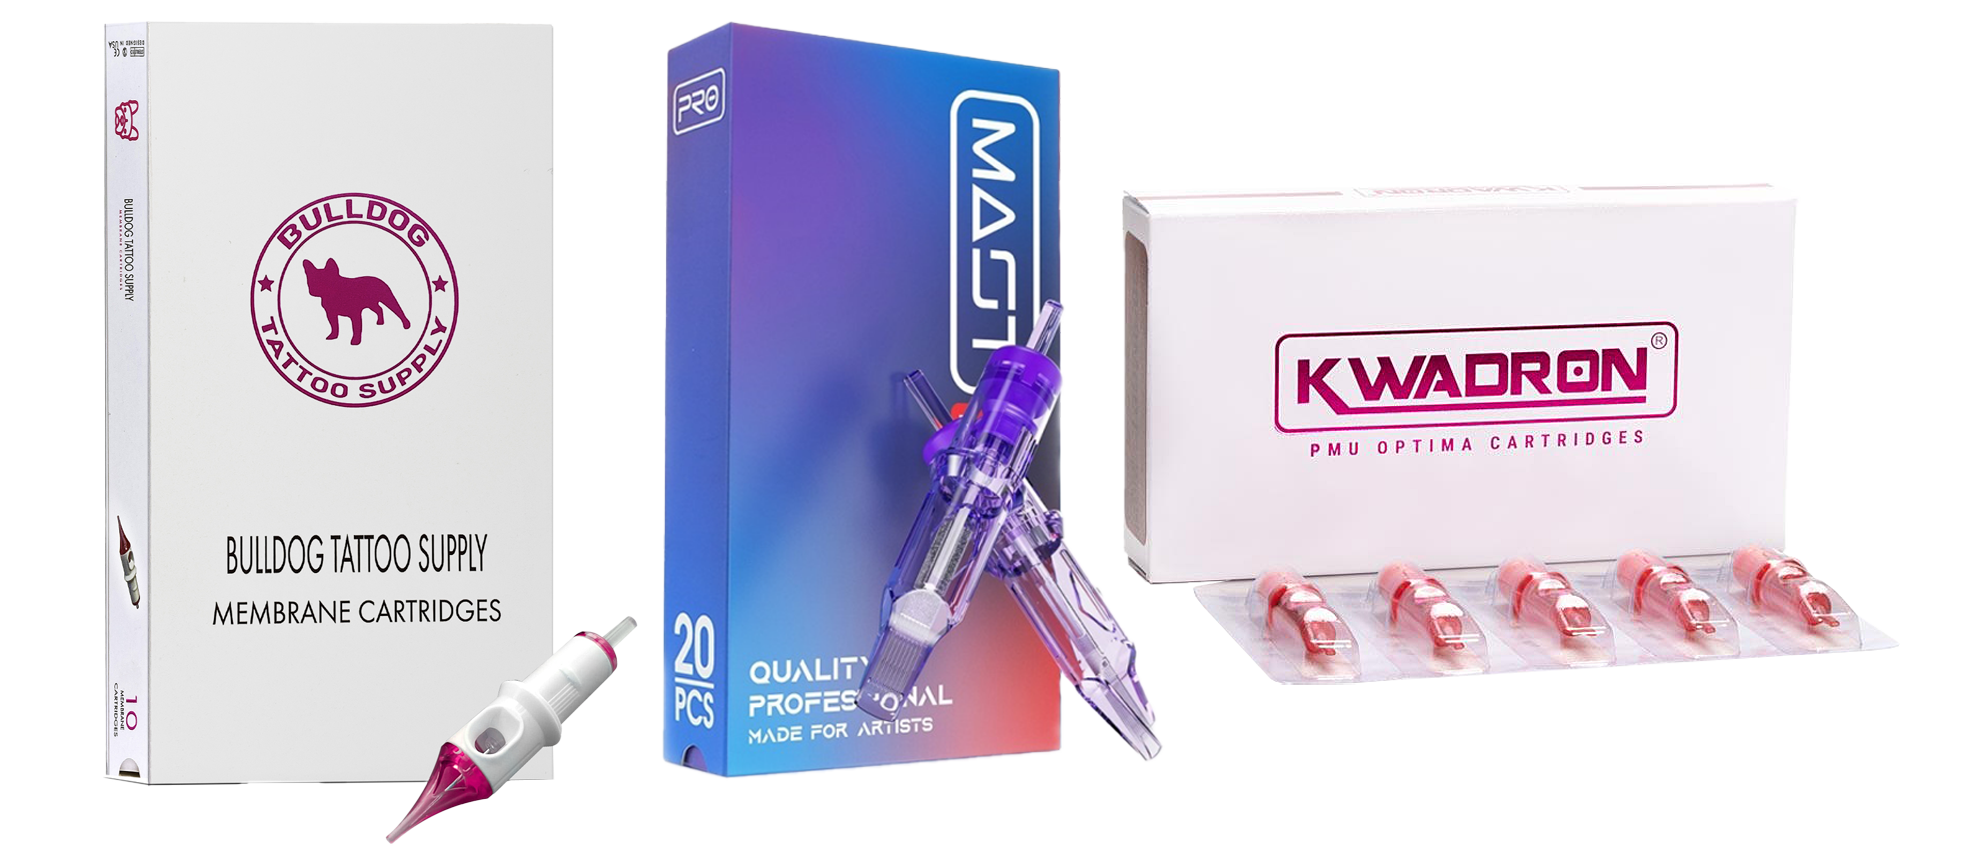
Permanent makeup modules can be purchased at the Beauty Hunter online store. They are available in a wide range and at different price points. Mast Pro cartridges are the most budget-friendly, costing 24 UAH each. Bulldog and Kwadron cartridges cost about 38 UAH and 36 UAH respectively on average.
I hope I was able to reveal all the secrets of choosing cartridges for permanent makeup. This was Anya Sobakina. I won't say goodbye for long—I'll be back soon with more useful tips!